Science Discovery Days (Student worksheets provided)
Scientific Method Unit & Safety Rules (Unit notes, worksheets, and lab ideas provided)
Consumer Challenge (Student worksheets provided)
Old Wives Tales Investigation (Student worksheets provided)
Silly Science (Classification) (Student worksheet provided)
Mystery Bags
Film Canister Fun
Bioglyphs (Student worksheets provided)
Pottery Pieces
Innovative Inventions - Internet project (Sites from the Kid Zone) (Student worksheet provided)Inventor's Challenge - Internet project (Sites from the Kid Zone) (Student worksheet provided)
A Journey Through Time -Internet project (Sites from the Kid Zone) (Student worksheet provided)
Science A to Z Puzzle (Student worksheet provided)
Super Scientist Challenge (Student worksheets provided)
Science Discovery Days (T. (Trimpe) Tomm, Havana Junior High, Havana, IL)
The students in my 7th grade accelerated science classes develop science lessons for elementary students in our district that target a single concept and use “hands-on” activities. Teams are required to prepare a lesson outline, activities, worksheets, and assessments. I allow three class days to prepare for the lesson, create the lesson worksheet, and practice time. I assign a team of 3-4 students to each 3rd grade classroom and allow 25 minutes of "teaching time." The teams usually start with an introductory activity, then split into smaller groups for some hands-on activities. Once they finish in one classroom, the teaching teams rotate to the next one and share their stuff with a new group of youngsters.
The response from my students has been very positive! They enjoy working with the younger students and get a good understanding of the topic after they have taught it several times. The younger students love our visit and have a great time with the big kids. Since I have done this project for several years, I now have the first "Discovery Days" students in my junior high building. They remember the lessons from their 3rd grade days and have a connection with me that helps smooth the adjustment to the new building. This is one of those projects that goes beyond what can be seen on lesson day. The experience of the younger students as well as the older kids will last for years to come.
Project Worksheets: Science Discovery Days (pdf) (includes student information, lesson plan page, and grade sheet)
| Back to top |
Scientific Method & More (T. (Trimpe) Tomm, Havana Junior High, Havana, IL)
I use a variety of lessons and activities to introduce students to the process of scientific inquiry. During the two days of the unit, we discuss the unit notes and students complete the "Drops on a Penny" lab. During the lab, students investigate cohesion as they try to fit as many drops of water as possible on one side of a penny. As we discuss the lab results, I ask students to identify the various steps involved in the experiment (hypotheis, testing, analysis, and conclusion) and challenge them to evaluate the reliability of the collected data. I use the SpongeBob worksheets (described below) to discuss variables and controls as well as relate the concepts to the "Drops on a Penny" lab. We also discuss safety rules for the science classroom to lay the "ground rules" for future lab work. I have also provided worksheets for Independent Investigations, which are used throughout the remainder of the school year to provide opportunities for students to use the scientific method. More information about the Independent Investigations has been provided in that section below.
Scientific Method Unit Notes - Scientific Method Notes (pdf) - The note worksheet I use to introduce a basic version of the "scientific method". The download includes a student worksheet as well as an answer key that can be used to make an overhead master. This page is just one of the unit note pages. I have students staple other worksheets from this unit to the note page. At the end of the unit, they have a set of notes that will help them complete the unit review and prepare for the unit exam.
NOTE: I emphasize that there are several different versions of the "scientific method". While there are similaries and differences between the scientific methods available, all the versions describe an organized process that helps us find answers to questions. The other worksheets provided for this unit may be adapted to fit the scientific method you use for your unit.
Drops on a Penny Lab Worksheet - Penny Lab (pdf)
The download includes a lab worksheet and teacher notes. I have also included information and worksheets for a demo I use to introduce the concepts of cohesion and surface tension prior to having my students complete the penny lab.
SpongeBob Scientific Method & Safety worksheets -
• Bikini Bottom Experiments (pdf) - Students analyze experiments to determine if they were done correctly and/or if the results are reliable. They are also challenged to write their own experiments using their knowledge of the scientific method. An answer key has been provided.
• Controls & Variables 1 (pdf) & Controls & Variables 2 (pdf) - I use these worksheets after discussings control groups, independent variables, dependent variables, and data analysis. Challenge your students to analyze experiments from Bikini Bottoms, the land of SpongeBob and his pals! Answer keys have been provided
• Bikini Bottom Olympics (pdf) - Use this worksheet to explore data analysis. Thanks to Faith Cohen for sharing this worksheet.
• Science Safety Rules w/ SpongeBob (pdf) - Students identify safety rules that SpongeBob and his pals broke as they performed experiments. Download includes notes for the teacher and an answer key.
NOTE: SpongeBob SquarePants and all related characters are trademarks of Viacom International Inc.
Independent Investigations- Independent Investigation Lab Worksheet (pdf), Independent Investigation Guidelines (pdf) , andIndependent Investigation Grade Rubric (pdf)At the end of my scientific method unit, I challenge my students (usually working in pairs) to create an experiment of their own using pennies and drops of water by following the basic steps in the scientific method. A few ideas ... Which will hold more drops of water: cold penny or hot penny; new penny or old penny; and head side or tail side? Student groups have also created experiments to test different substances: different brands of soaps, shampoo/conditioners, or other safe household liquids. I always emphasize the need for safety! Each group must have my permission before attempting any part of the experiment. If a group has not addressed possible errors or safety rules, I have them rewrite the lab until it meets with my approval.
Other ideas ... I give the students several chances throughout the year to create their own experiments using the Independent Investigation format. I provide only the topic and allow the students to create a question and design an experiment to find an answer. My students have experimented with bouncy balls, Hot Wheels cars, tops, yo-yos, and other toys that are easily available. For example, students work in pairs to create a question about bouncy balls, such as "Does the diameter of the ball influence the height of the bounce?" Students design the experiment by completing the first few sections on Ind. Investigation worksheet and have the experiment approved by me before they attempt the lab. If time is available after the labs are completed (or as an extra credit on-your-own-time project), I have the groups exchange experiments. After the experiments are completed, the groups meet to discuss the results, which provides a great opportunity to discuss problems related to the design of the experiment or data collection. Many times the groups come up with different results and the kids ask to repeat the experiment to see who is right! It is great to see them taking the initiative to experiment on their own and develop ways to address errors that could cause unreliable data - all without prodding from me!
Mythbusters (PDF) - Use this worksheet with any of the Mythbusters episodes to explore how Adam & Jamie apply the scientific method to explore myths and legends. After viewing a video, challenge your students to develop their own Independent Investigation to test one of the myths from the show.
Need clips from the show? Try these links: Discovery Channel - Mythbusters, How Stuff Works: Mythbusters Search,AOL Videos: Mythbusters, YouTube: Mythbusters
NOTE: As with any online videos, be sure to review them before showing them to your classes!
Come Fly With Me - Thanks to Jessie Bergman for sharing her paper airplane project that she uses with her scientific method unit. Version 1 is the basic version and provides detailed instructions for the students. Version 2 is the advance version that challenges students to develop their own procedure for the experiment.
| Back to top |
Consumer's Challenge (T. (Trimpe) Tomm, Havana Junior High, Havana, IL)
My students work in research teams (2-4 students) to challenge the claims of products available to consumers. From paper towel advertisements to powerful battery claims, my students take the lead in their learning and investigate their world using the scientific method.
During the first part of the project, students choose a product, create their question/hypothesis, and develop their procedure. They are required to incorporate methods to ensure reliable results and to address safety concerns. Before the experiment day, teams list the materials needed and gain final approval from me. After the experiment, students use their data to construct a graph and write a conclusion. Each team is required to create a presentation to report their findings to their classmates.
The students earn two grades: one for the experiment portion and another for their group work. While I determine the grade for the experiment portion of the project, the students help determine the member grades (effort and participation) by completing a Group Rating form. The form allows them to assess the effort and participation for themselves as well as for their classmates. The scores are averaged to calculate the individual grades for each team member.
| Back to top |
Old Wives Tales (contributed by Sarah Bynum, Atascadero Junior High in Atascadero, CA)
To introduce this lesson, students discuss old wives' tales and define the difference between them and superstitions. The class creates a list of the tales on the board and each group chooses one to investigate. They have to choose one that is can be tested safely and in a short amount of time. Groups use the scientific method to explore the accuracy of the tale and keep a record of their results. After all the investigations are completed, the students write a lab report and give a brief oral report to the class.
Student Worksheets: Old Wives Tales (pdf)
| Back to top |
Silly Science - Dichotomous Keys & Classification (T.(Trimpe) Tomm, Havana Junior High, Havana, IL)
This quick and easy activity introduces students to the world of dichotomous keys. Keys are available for a wide range of items, from trees to insects. Students may extend this lesson by creating their own keys using ordinary items (sewing items, art supplies, food, animals, doughnuts, candy, etc.) I use this activity to teach students how to use a dichotomous key before they attempt to use other dichotomous keys, such as Mineral Match, my mineral identification lab with a key created specifically for my mineral sets.
Materials Needed/Answer Key: Whatnot: white marble, Fancy Whatnot: colored marble, Screecher: white chalk, Wadget: unsharpened pencil, Widget: sharpened pencil (more than 10 cm), Gadget: wooden splint (popcicle stick), Cubey: die, Oopsey: eraser (less than 10 cm), Itsy Bitsy: small paperclip (less than 3 cm), and Super Duper: large paperclip (more than 3 cm).
Student Worksheet: Silly Science (pdf)
A cool idea from Dennis Moore (John Deere Middle School, Moline, IL) ...
To teach his students about dichotomous keys, Dennis Moore challenges his students to develop a key to identify the letters of the alphabet. He provides a list of ten letters (such as A-J) and instructs them to create a key. They must create new groups for the letters, such as curvy or loopy, based on the shapes and lines used to write the letters. After the students have the first ten letters classified, he gives the students 3 to 4 additional letters. The students must use the key they created to determine the classification for the new letters. If the letter doesn't match one of the original groups, students must readjust their keys to make room for the "new species".
| Back to top |
Mystery Bags (T. (Trimpe) Tomm, Havana Junior High, Havana, IL)
Collect several items that will fit into brown paper lunch bags. Items I have used include floppy disks, cotton balls, soap, deck of cards, paperclips, band-aid, paint brush, index card, eraser, cd (AOL provides lots of these), and stick of gum. Place in lunch bags, staple top, and number. Pass each bag around the room and allow students time to write down any physical characteristics they notice along with their best guess to its identity. (For soap and gum, challenge them to name the brand.) This activity is an annual hit!
Student Worksheet: Mystery Bags (pdf) - Submitted by B. Peck
| Back to top |
Film Canister Fun (submitted by Judi Flaherty, Quincy, MA)
I learned the following activity at a Museum of Science camp-in and have used it dozens of times in many different venues from Physical Science class to ice breakers in Youth Group. Use the film canisters to divide the kids into groups or teams or with same materials have them work in teams to study the scientific method or deductive reasoning.
If you have 30 kids and want 5 groups of 6, you will need 30 film canisters (all alike). Put them in rows of 6, with caps off and fill each row with something different, such as rice, pennies, marble, popcorn, paper clips, water, karo syrup, magnet, push pin, eraser, etc. You'll have 6 canisters with rice in them, and 6 with paper clips, etc. Put the lids on the canisters and put them all in a bag. Have the kids each pick one and then move about the room shaking the canister and trying to find the other members of their group based on the sound they hear. Once in the group they can try floating, rolling, shaking, etc. to come up with a hypothesis for the contents or deduce the contents based on non-visible evidence. It's quite fun, has endless combinations and possibilities, and the kids really get in to it.
| Back to top |
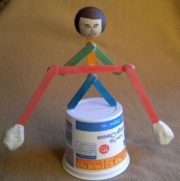
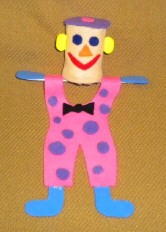
Bioglyphs (original idea from Katie Stapleton, NJ, and Nancy Nega, Churchville Middle School, Elmhurst, IL)
A great activity to challenge the code reading ability of your students. I also reference this activity in our lessons on classification. For this activity, students develop a face diagram using symbols. From hair color to birthdays, students share a little about themselves with their classmates. After all the bioglyphs have been completed, display them in the hallway or other area of your classroom and challenge your students to identify their classmates. Students may ask questions that require yes or no answers only! "Is this your bioglyph?" is not an acceptable question! After fifteen minutes, have each student write their name on their picture and allow time for them to check their answers. My students had a great time identifying their classmates and I enjoyed bringing a little of their history lesson about hieroglyphics into science class.
Student Worksheets: Bioglyphs (pdf) - Includes all the Worksheets for this activity.
Also available ... Bioglyph PowerPoint - Use this presentation to help your students as they create their bioglyph.
| Back to top |
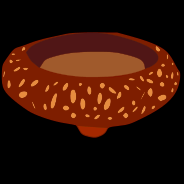
Pottery Pieces (contributed by P. Downs, Havana Junior High, Havana, IL)
Mrs. Downs, a former 6th grade teacher, incorporated this activity during a unit on Inca, Aztec, and Maya culture, but it would make an excellent addition to any science class by challenging students to use their scientific skills (powers of observation and problem solving skills) in a different setting.
Each group of 4-5 students receive a 4" clay pot that they decorate with symbols of our present day culture. They keep their pot from being seen by the other groups by keeping them a paper bag when they are not being decorated. She tells them that they will then exchange pots and try to have another group decipher what the symbols really mean. Once most of the pots are mostly done, a "Great Catastrophe" occurs---a volcanic eruption, earthquake, or whatever!!! All the pots are placed in one bag (really, 2-3 bags, for strength) and smashed with a hammer. She then puts the same amount of broken pottery back in their bags, which now has pieces from all pots. The next time the students work on them they notice the bags 'feel funny'.
Mrs. Downs writes, "You should see their faces when they realize what has happened!! It seems to really bring home the reason why we know so few 'for sure' facts about ancient cultures if they have this much trouble reassembling pots made now!! Good ole Elmer's Glue works to put them back together, as well as rubber cement. Then we make a big deal about not telling the next class of 6th graders what we just did."
| Back to top |
Innovative Inventions (contributed by S. Baker, Pleasant Hill, Peoria, IL)
Be sure to visit the Invention Links page of the Kid Zone!
Through research, students discover when certain items were invented. Using the information they collect, students create a timeline to show the progression of technology over the years.
| Back to top |
Inventor's Challenge (T. (Trimpe) Tomm, Havana Junior High, Havana, IL)
Be sure to visit the Invention Links page of the Kid Zone!
This twist on Innovative Inventions challenges students to explore the history of science and technology and the contributions by various ethic groups. Students search the sites listed on the Invention Links page of the Kid Zone to complete the worksheet. I do allow students five "freebies" to use if they cannot find information for some of the inventors. Students use 15 of the inventions from the worksheet to create a time line on a piece of adding machine tape.
Student Worksheets: Inventor's Challenge (pdf) (includes the answer key) and Inventor's Challenge Time Line Directions (pdf)
Also available - Inventor's Challenge Word Search (pdf), Inventor's Challenge Review (pdf), and Inventor's Challenge Quiz (pdf)
| Back to top |
A Journey Through Time (developed by S.Baker, Pleasant Hill, Peoria, IL and T. (Trimpe) Tomm, Havana Junior High, Havana, IL)
Be sure to visit the Invention Links page of the Kid Zone!
During this activity, students work with their classmates to investigate various time periods to identify scientific developments and historical events. The information from their research to create a time line to share their results.
| Back to top |
Science A to Z Puzzles (T.(Trimpe) Tomm, Havana Junior High, Havana, IL)
Students are challenged to find 26 science terms in the puzzle. (Puzzle #2 has words that bend at least once!) I use this puzzle as an introductory lesson at the beginning of each new year. As an extension, students may (1) write a report, (2) create a model, or (3) make a presentation on any of the terms in the puzzle. If you use this puzzle at the end of the year, you might consider challenging the students to create a concept map or web that would show the relationship between the various topics in science by integrating all of the words in the puzzle!
| Back to top |
Super Scientists Challenge (developed by T. (Trimpe) Tomm, Havana Junior High, Havana, IL and S.Baker, Pleasant Hill, Peoria, IL)
During this lesson, students use their code-reading skills to identify 34 different scientists. I do this lesson at the beginning of the year and refer back to it whenever we start a new unit. An extension lesson has been provided to allow the students to research one of the careers on the Internet using the sites available on the Career Links or the Reference Desk Pages of the Kid Zone.
Worksheets: Super Scientists Challenge (pdf),Super Scientists Challenge Answer Key (pdf), Super Scientist Quiz (pdf), and Super Scientist Fact Sheet (pdf)
Also available ... Super Scientists Crossword Puzzle (pdf) and Super Scientist Test (pdf) - Thanks to Malissa Lyons for sharing these worksheets!
NOTE: The challenge worksheet provided has been designed to be copied back-to-back. The students are able to fold along the line on the front allowing them to use the code when completing the back of the worksheet.
Super Scientists Study Tips (pdf) - Over the past few years, my students have created phrases or tips to help them remember the scientists. Feel free to use the tips provided or challenge your students to create their own!
Super Scientists Bingo Game (pdf) - The download contains a bingo card as well as clue cards. I print the clues on an overhead transparency, then cut them apart and put on the overhead during the game. I give the kids a roll of Smarties to use as markers, but warn them that don't get to eat them unless they are good. I also challenge the kids tell me what each scientist does when they read off their bingos. I encourage the kids to make notes on their bingo card which can be used to study for the quiz.
ALSO AVAILABLE ... Science Bingo Teacher Tips (pdf) - Includes a description of my version of bingo and a "blank" bingo card you can use for any topic.
Also visit my Quia page for Super Scientists challenge board (Jeopardy format) or the matching game.
Super Scientist Vocab Cards (pdf) and Super Scientists Vocab Cards Answers (pdf)
NOTE: I print the vocab challenge cards on cover stock. I copy the cards on one side and the answers (or letters to match) on the other. Once the students have matched all the cards, they can check their work by turning the cards over. If the letters match, they are correct. If not, they know the ones they need to study! I also provide stopwatches for them to time their trials. Students who are able to match all the cards in a specific amount of time (usually under 1 minute) get to add their name to a star and receive a treat.
Also available ... Super Scientist Activity Worksheet (pdf) to use with the vocab matching cards in a small group setting. Thanks to Tina Jenkins for sharing this worksheet!
|


